Save Your Photos

  • Home
  • Blog
  • Disaster Help
    • Disaster Resources
    • Hurricane Harvey Photo Recovery
    • Hurricane Irma Photo Recovery
  • Who We Are
    • Save Your Photos Group
    • The Photo Organizers Blog
    • Association of Personal Photo Organizers
  • Sponsors
    • How To Become A Corporate Sponsor

Sep 06 2017

We Have to Evacuate! How Do I Keep My Photos Safe?

We Have to Evacuate! How Do I Keep My Photos Safe?

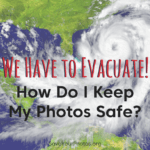
If you’re looking at evacuating ahead of a storm, there isn’t time to scan your photo collection. You need to focus on ensuring the safety of your family and preparing your home as much as possible.

We Have to Evacuate! How Do I Keep My Photos Safe? | SaveYourPhotos.org


What To Do Before The Storm Hits

Here are some basic steps you can implement before the storm hits to give your photos the best possible chance of surviving the storm dry and intact.

Backup

Backup your computers and hard drives, including your photo collections. Keep a copy of your backup secure in the cloud. Bring your backup drive with you, and store another copy at a friend’s house that is out of the storm’s path.

We Have to Evacuate! How Do I Keep My Photos Safe? | SaveYourPhotos.org

Find Your Photos

Do a sweep through your basement, first floor, and garage. Do you have boxes or bins of memories stored there? Are your albums on a low bookshelf or coffee table? What about framed photos on walls or mantles? Gather them up so you can protect them. Children may be able to help with this step.

Protect Your Printed Photos

Wrap photos in double layers of plastic, sealed tight. This could mean zip-top bags or a plastic garbage bag sealed with duct tape. Smaller baggies secured inside a larger garbage bag is a good system. If any of your frames have sharp edges, pad them, so they don’t rip the bags. Don’t forget to LABEL THEM. As an added precaution, you can put the wrapped packages in a plastic bin.

We Have to Evacuate! How Do I Keep My Photos Safe? | SaveYourPhotos.org

Plastic bins may be water resistant but are not water tight. Floods can lift and carry heavy boxes, and can tip them over, so the water gets in.  Make sure everything in the bins is wrapped in plastic.

You can put a few desiccant packs (like the ones that come in shoe boxes) in the container, making sure the photos are wrapped up separately and protected from any chemicals.

Get To Higher Ground

Move the bins of wrapped up photos to the highest level of your home and choose an upper shelf of a bedroom closet or any closet on an upper floor. A closet will keep bins from floating around or tipping.


Above all stay safe, and we wish you all the best as you weather the storm and its aftermath. Visit saveyourphotos.org to learn what to do after the storm with any water damaged photos.


Kathy Rogers of Baltimore Photo SolutionsKathy Rogers loves photos and the stories behind them. Since 2012, as the founder and CEO of Baltimore Photo Solutions, she has been helping others to preserve their photos and share their legacies. She is a certified photo organizer and APPO member. 

Kathy’s first career was in health care. She brings lessons learned from her public health training into her photo books for families dealing with dementia and now, in blogging about disaster preparedness.
We Have to Evacuate! How Do I Keep My Photos Safe? | SaveYourPhotos.org

Written by Andi Willis · Categorized: Photo Storage, Safeguard · Tagged: backup, disaster preparation, emergency preparedness, how to keep my photos safe, how to store photos, hurricane, photo storage

Aug 18 2015

How To Rescue Photos from Magnetic Albums

How To Rescue Photos from Magnetic Albums

This is a guest contribution from Meaghan Kahlo of Ephemera Photo Organizing.

Magnetic Photo Albums
Your parents almost certainly have some. Maybe you have a few. They seemed like such a good idea at the time! So affordable! How could we have known the problems they would cause?

Acidic, cardboard pages. Covered in yellowing, sticky adhesive. Encapsulated in plastic sheeting. Spiral bound or three-ring binders. The magnetic photo albums so ubiquitous in the 1970s.

Personal photo organizers, archivists and conservators all agree that these inexpensive albums are among worst places to store your precious family photos. Your photos desperately need to be rescued from these cheap and harmful albums that have been their home for the past several decades.

What kind of damage have these albums been causing to your photos over the years? The cardboard pages are highly acidic and seep peroxide, yellowing both black and white and color prints. The tacky glue that seemed like such a convenience is also highly acidic and will slowly deteriorate the prints. Additionally, the glue breaks down, hardens and fuses the photo to the page making it difficult to remove. The cheap plastic overlay to the pages exacerbates the deterioration of the photos by off-gassing and sealing harmful chemicals in close to the photo print itself. Deterioration of prints in this type of album is hastened further if the albums are stored in unstable environments like the attic or basement where temperature and humidity fluctuations can wreck even more havoc on fragile images.

Personal photo organizers, archivists and conservators have developed certain techniques to help release photos from pages of the destructive1970s magnetic albums. These techniques are employed with the intention to prevent further damage to the photos themselves.

Waxed dental floss has been an effective tool for releasing photos from the pages. Slide the dental floss under a corner of the photo and gently saw through the glue as you pull the floss behind the photo. Take care not to tear the photo paper or bend the photo and crack the emulsion surface. Sometimes a small hair dryer on low or warm will be helpful to soften the glue just enough to slide the floss through. Take care not to overheat the page or the photo causing additional damage.

A product called Un-Du is available, generally utilized to remove labels and stickers. Place a small drop of Un-Du on a rounded, dull crafting spatula and slide the tool through the glue to help release a photo. Take care to use the smallest effective amount of Un-Du with each photo.Some pages will likely release the photos easier than others. Others could be a bit of a struggle. If the photo or photos are stuck hard to the page or to each other, scanning the entire page may be the simplest approach.

Finally, take care to preserve any notes or inscriptions from the album that go along with the photos before discarding the old pages. Sometimes this style of album just had a paper sheet at the beginning of the album where dates, places and names for each album page could be listed.

Take some time today and you can rescue your precious photos from a terrible fate of languishing in the harmful magnetic albums of the past.


Sign up today for more great photo organizing tips directly in your email box.

We also invite you to visit our sister blog The Photo Organizers for more tips and in-depth knowledge from some of the top photo organizing industry professionals. To find a photo organizer near you, visit the Association of Personal Photo Organizers.


Meaghan Kahlo

Meaghan Kahlo, owner of Ephemera Photo Organizing of Seattle, WA, began her professional life with graduate work in museum studies focused on collections management. Her enthusiasm for photography and historical preservation combined with a passion to organize and create order are the driving forces behind her business. Meaghan helps clients transform the ephemeral nature of digital and printed images into meaningful photo solutions.

Written by Mary Moseley · Categorized: Photo Storage · Tagged: how to store photos, how to store pictures, photo albums, safe photo albums

© Copyright 2017 Association of Personal Photo Organizers · All Rights Reserved · Privacy Policy