Save Your Photos

  • Home
  • Blog
  • Disaster Help
    • Disaster Resources
    • Hurricane Harvey Photo Recovery
    • Hurricane Irma Photo Recovery
  • Who We Are
    • Save Your Photos Group
    • The Photo Organizers Blog
    • Association of Personal Photo Organizers
  • Sponsors
    • How To Become A Corporate Sponsor

Jan 10 2018

Save Your Photos: Convert Your Home Movies

Save Your Photos: Convert Your Home Movies

Time is wreaking havoc on the audio and video quality of your home movies. It’s time to convert them if you haven’t already done so.

Save Your Photos: Convert Your Home Movies | SaveYourPhotos.org

Let’s talk about your home movie collection. Remember that clunky VCR camera that helped you capture your baby’s first steps? Do you have memories of watching grandpa’s home movies with the family projector? When was the last time you were able to enjoy these memorable glimpses into the past?


Your Memories Are Fading

It’s time to do something about the rest of your memory collection trapped on film or magnetic tapes. These treasures are particularly delicate and need your attention soon. Magnetic tapes (VCR) have a shorter lifespan than film (grandpa’s home movies) and begin to deteriorate after ten years. But film has its problems too. If you smell vinegar, or your film has white or green chalky particles, then you need to act fast and work with a professional conversion service.


What to look for in a Home Movie Conversion service

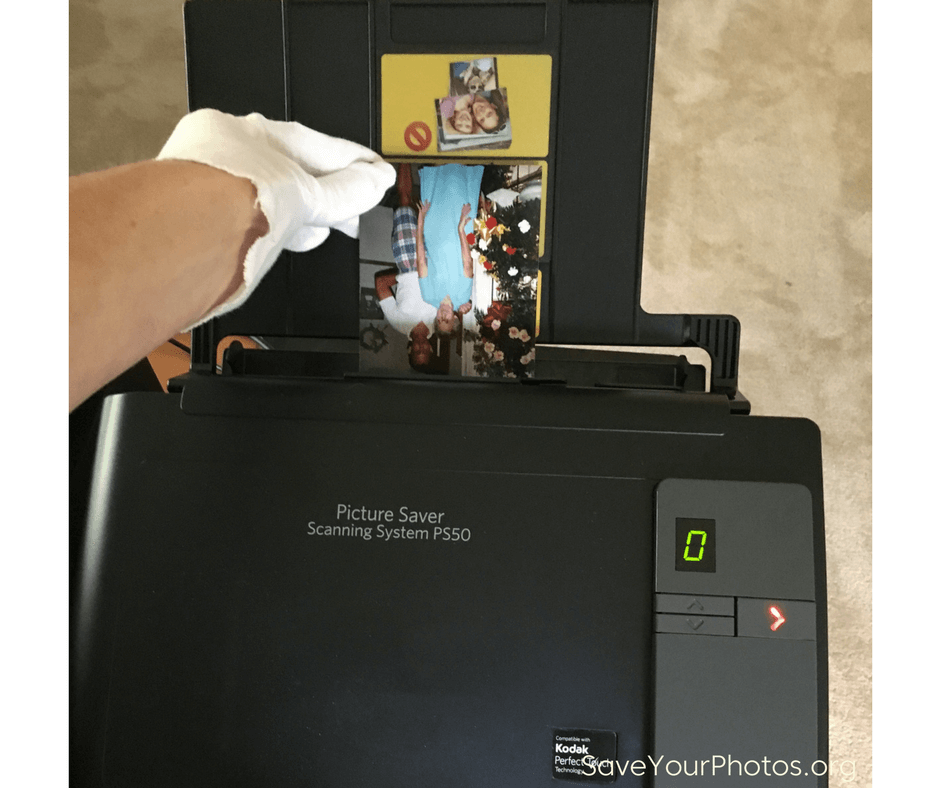
  • Investigate how the work is done and who is doing it. Transfer services are abundant, and many of them use primitive equipment with minimally trained staff or film handlers. Many of these services use a modified projector with a video camera in it which tapes the image. They often don’t have the tools to improve the picture and can damage the film, and sometimes your film is sent out of the country.


  • Look for transfer services that use a sprocket less, capstan system designed specifically for scanning. This is the same type of equipment used by the Film and TV industry. This kind of equipment has tools that offer color correction, dirt and scratch concealment, high resolution and more. You’ll pay more for high-end conversion, but it’s worth it.


  • Ask your provider about the quality of their output. What is the highest resolution they can provide? Your goal is to have a high-resolution original as your master copy that will remain in your hub. You will edit and use derivatives to transfer to DVD or stream online (YouTube or Vimeo). If your provider only offers transfer to DVD or streaming to an online account, find another vendor. These files are highly compressed.


Once your home movies are converted, rename the files and store in your digital photo hub in their corresponding folder.

Save Your Photos: Convert Your Home Movies | SaveYourPhotos.org

Don’t Forget Your Digital Photo Hub

Now let’s circle back to when we encouraged you to choose a digital photo hub that has a large capacity and stored locally on your computer or external hard drive. Your entire memory collection, which now contains high res images and high res videos, needs a ton of space! As your collection grows, so does your space requirement. Your locally stored hub should be easy to duplicate (copy to an external drive) and backup (manually or automatically) and is readily available at all times (doesn’t depend on an internet connection).


It’s time to move on to the fun part! Let’s start sharing and enjoying your precious memories.


Sign up today for more great photo organizing tips directly in your email box.

We also invite you to visit our sister blog The Photo Organizers for more tips and in-depth knowledge from some of the top photo organizing industry professionals. To find a photo organizer near you, visit the Association of Personal Photo Organizers.

Written by Andi Willis · Categorized: Digitizing, Videos · Tagged: how to convert home movies, how to digitize old film

Jan 03 2018

Save Your Photos: Scan Your Pictures

Save Your Photos: Scan Your Pictures

Scanning your printed photos and slides extends the lifetime of your pictures, creates a backup, and increases your ability to share and enjoy your memories.

Save Your Photos: Scan Your Pictures | SaveYourPhotos.org


Now that your analog collection is organized (or at least in progress), it’s time to get some or all of these treasures scanned.

Why Scan Your Pictures?

Scanning extends the lifetime of your photo.

Your printed photos are decaying and deteriorating even under optimum storage conditions. When you make a digital copy, you have the ability to enhance the image, restore it to its original color and fix damaged any damage. Digital photos can be migrated into new forms as technology changes, extending the life of your image beyond the original print.


Scanning creates a backup of your printed images.

Right now, you have one copy of those prints with no backup unless you were particular about saving and cataloging your negatives. Your digital copy will be stored in your digital photo hub with the rest of your digital images, and will get backed up during your normal workflow.


Scanning increases your ability to share and enjoy your photos.

Families with printed photos face similar dilemmas. How will I divide my printed photos between my kids? Who gets what? What if they have storage space issues? I created scrapbook albums, and everyone in my family wants one! When you have digital copies of your photos (and your albums), your problems are solved. In their digital form, your printed photos can be shared via social media and online photo archives or put into slideshows and photos books.


Save Your Photos: Scan Your Pictures | SaveYourPhotos.org

How To Scan Your Pictures

Begin by reviewing your printed photos and slides and determine the quantity now that you have purged during the organizing process. Consider how you want to use these digital images so you can determine the minimum DPI that you need your images scanned. We recommend a minimum of 600 DPI depending on the original size of your image, and what you intend to use it for. For example, a 2×3 photo that you want to display on your wall as a canvas print may need scanning at a much higher DPI. If you are scanning slides, your DPI will be considerably higher and will be determined based on the end goal for your digitized copy. Work with your scanning service provider to help determine your needs.


Will you scan at home or use a service?

Local and online scanning services are an excellent choice for time-starved individuals and can be an affordable solution if you don’t have a quality scanner at home. Look for service providers that offer image enhancement and white glove service. Some big box stores ship your photos out of the country for processing. Do your homework!

If you scan your pictures at home, take extra care when handling your photos. Wipe your printed photos with a clean cloth and keep the scanner glass clean and dust free. Scanners will pick up dust, scratches, and smudges and magnify them in your image.

Do you have thousands of photos to scan? Consider buying a high-speed scanner or better yet, rent one. A high-quality, high-speed scanner can process your scans at an average of 50 prints per minute depending on the scanner. That’s roughly 2,000 – 3,000 photos per hour. Choosing a high-speed scanner for large jobs saves you time and money. Google ‘rent a scanner’ to find a scanner that suits your needs and budget.


Sign up today for more great photo organizing tips directly in your email box.

We also invite you to visit our sister blog The Photo Organizers for more tips and in-depth knowledge from some of the top photo organizing industry professionals. To find a photo organizer near you, visit the Association of Personal Photo Organizers.

Written by Andi Willis · Categorized: Digitizing · Tagged: how to scan photos, scan photos, scan pictures, scanning

© Copyright 2017 Association of Personal Photo Organizers · All Rights Reserved · Privacy Policy