Save Your Photos

  • Home
  • Blog
  • Disaster Help
    • Disaster Resources
    • Hurricane Harvey Photo Recovery
    • Hurricane Irma Photo Recovery
  • Who We Are
    • Save Your Photos Group
    • The Photo Organizers Blog
    • Association of Personal Photo Organizers
  • Sponsors
    • How To Become A Corporate Sponsor

Jul 09 2015

Saving Slides from a Purgatory in the Garage

Saving Slides from a Purgatory in the Garage

This is a guest contribution from Meaghan Kahlo of Ephemera Photo Organizing.

Save Your Slides

My parents have always been the adventurous type. You could say that adventure has defined their entire relationship. They met while hiking at the bottom of the Grand Canyon, fell in love and were soon married. They then scrimped and saved so they could take a year-long honeymoon traveling in Europe and the Middle East. This was the mid-1970s and 35mm slide film was the least expensive way to take photos. You didn’t have to get prints made from slide film to see your images and most people actually had slide projectors and screens, or at least a white sheet to tack up, at home.

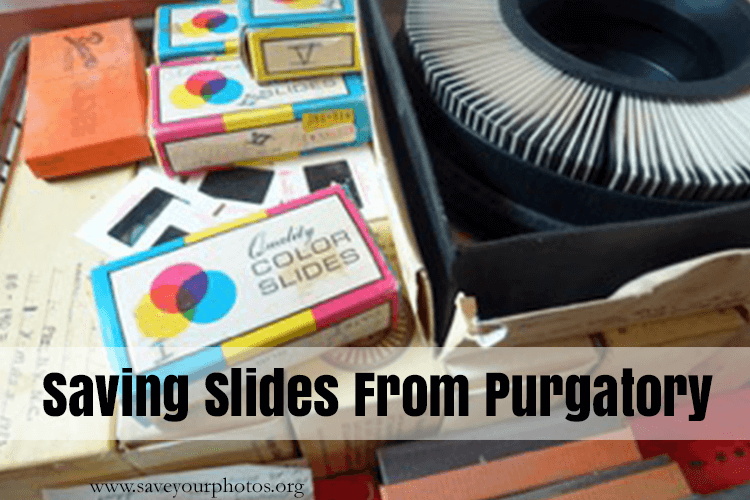
Although my parents had been fairly well organized about listing the dates and locations of these slides from the early part of their lives together, the slides began to languish in their carousels and small cardboard boxes from the processing lab. Eventually the whole slide collection was stacked in a milk crate and placed in the garage along with other usurped media like their vinyl albums.The slide projector and screen were sold or cast off and then the slides were kind of forgotten about.

This past January when I was home for a visit I took a closer look at the condition of the slides. I was relieved the crate of slides had at least been moved from the very unstable environment of the garage into a spare bedroom, but I was alarmed by evidence of water damage and some mold spots on the carousel boxes. It appeared that the slides themselves had not been damaged by water or mold but they were certainly dusty from their years of purgatory in the garage.

What past and possibly forgotten adventures had the slides captured? Wouldn’t it be thrilling to find out again and be able to view them all together on a large screen again? It was finally time to rescue these slides from their previous fate and have them digitized.

First the slides need to be taken out of the various boxes and the large plastic carousels and then placed into zip top bags carefully labeled with the original dates and location information. The scanning lab would transfer this information onto the batches of digital files. During this step many slides were discarded if it was obvious after a quick glance that the image was blurry, a duplicate, or of some unidentifiable scenery. This drastically cut down on the ultimate number of slides to scan. The slides that made the final cut were shipped off to a reliable scanning vendor.

Within a couple of weeks the slides were returned along with a DVD of the high-quality scans. I was so excited to see that not only were all the travel pictures revived and brought back to life but there were so many photos of my childhood that I had never seen.

I know I will be having some of these rescued photos printed and framed very soon!


Meaghan
Meaghan Kahlo, MA

Meaghan, owner of Ephemera Photo Organizing of Seattle, WA, began her professional life with graduate work in museum studies focused on collections management. Her enthusiasm for photography and historical preservation combined with a passion to organize and create order are the driving forces behind her business. Meaghan helps clients transform the ephemeral nature of digital and printed images into meaningful photo solutions.


Do you have slides that you have saved or that need saving?  Tell us about it in the comments, we’d love to hear your story!

Written by Mary Moseley · Categorized: Recover, Restore

Jun 05 2015

How to Restore Your Old Photos

How to Restore Your Old Photos

This is a guest contribution from Melissa Shanhun at Digital Scrapbooking HQ.

Restore Old Photos

Take a minute to think about the photos that have surrounded you for years. There’s that faded print that’s been hanging on the wall – stuck to the glass of it’s frame. There’s the precious dog-eared photo kept in a wallet for many years. There’s the inherited photos so old and worn you can barely see a thing.

Wish you could restore those photos to their former glory?

For many of us saving our photos is more than just storing them away in archival boxes. If you are reading this post, it’s likely that you have a collection of photos that don’t existing in digital form and the negatives are long gone.

If you have a degree in archives management you may know the best way to restore these gems, but if you are like most of us, you are not going to be trying the infamous dental floss trick on your parent’s last surviving wedding portrait. The great news is that modern technology (namely, Photoshop Elements) can help you without worrying about ruining anything.

Here’s the simple steps I follow to restore those precious photos:

1 Digitize the Photo

Scan your photos, or use a tripod to get a clean square, high resolution image with your camera.

2 Restore the image

Photoshop Elements makes it easy to restore your images. It’s a one off purchase and will save you thousands compared to going with pro photo restoration and retouching.

The latest versions have a guided edit mode that steps you through the process of restoring your photo. It gives you a mini tutorial for each step so there’s no confusing jargon or missed steps.

Here’s a quick demonstration of a photo I restored in Photoshop Elements in just a couple of minutes.

Quick Steps to Restoring a Photo

  • Open the Photo you want to work on in Photoshop Elements.
  • Click File – Save as to save your original photo as a PSD file so that you can edit the layered file later.
  • Press Ctrl+J (or Cmd+J on the Mac) to duplicate your original photo so that you can compare before and after (and easily return to your original photo in case you need to!)
  • Click on the Guided Edit button at the top of the screen and select Restore Old Photo. Just work from top to bottom following along as Photoshop Elements suggests to get the best results.
  • Crop: With an old photo, you often have messy edges that you will want to crop off. Click and drag the corners to adjust your crop, and click the green checkmark to commit to the crop.
  • Heal: The Healing Brush tool allows you to fix bigger cracks and tears.
  • Adjust: You can improve the color and contrast of your photo using the Auto Correct buttons.
  • Save your work.
  • To print your final copy – Save it as a high resolution JPEG.
  • Upload to your favourite photo printing service.

I certainly don’t restore every photo I scan, but those precious few? I enjoy spending a couple of minutes working with them. It makes my heart happy to see those photos shine again!

Display and enjoy!

My favourite ways to enjoy my photos are using a slideshow on my desktop computer and printing 8x10s for framing. I know many people also love digital photo frames for the ability to rotate through their favorite images.

Melissa1


Melissa-2013 crop

Good day, I’m Melissa, Aussie mum, digital scrapbooker, professional organizer and teacher. I love pairing photos with memories of meaningful moments in my everyday life. Here in Perth, I spend my everyday life with my husband, Phill, and our three little ones: Emily, Edward and Lucy. Digital scrapbooking helps me tell the stories in our life. At Digital Scrapbooking HQ, I would love to introduce you to the joy of scrapbooking with your computer. I’ve been teaching and working with Adobe Photoshop Elements for many years, and my former career in education gives me the unique blend of skills needed to teach the technology skills, without the stress and fuss. Find out more here.

Written by Mary Moseley · Categorized: Restore

© Copyright 2017 Association of Personal Photo Organizers · All Rights Reserved · Privacy Policy